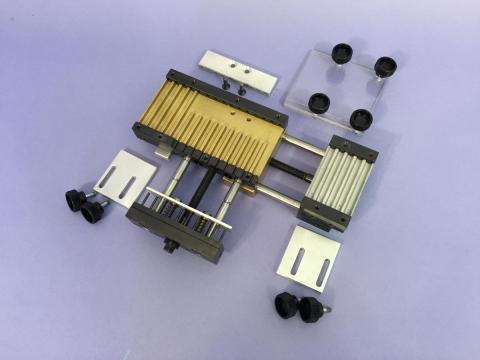
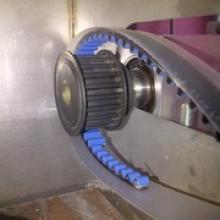
Our tools have been developed, optimized and patented for each configuration, depending on pitch, dimension, type of joint (ERO Joint® or ERO Joint® Ultimate), assembly method (screw or threaded rod) and tensioning option. Each tool is produced according to the customer's application, and belts are supplied with the appropriate assembly procedure.
Our tools are available for T10, AT10, T20, AT20, 8M and 14M belts (for all belt widths)
Our tools are available for every version of the ERO Joint® mechanical fastening system:
- for threaded rods or screws
- for ERO Joint® or ERO Joint® Ultimate
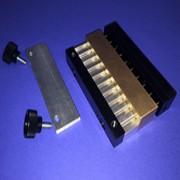
Basic version
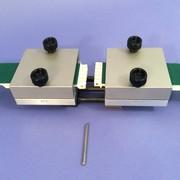
Version with power-on system
Tensioning system only (for ERO Joint® HP)
Belt fastener

Belt tension

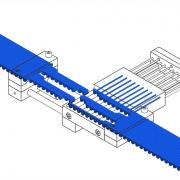
Threading rods
Poly Chain® GT Carbon™ ERO Joint® assembly video with tooling :
For example:
Procedure for assembling a Poly Chain® GT Carbon™ ERO Joint® Belt with threaded rods
Step 1:
Insert the Belt into the machine. Use the belt guide provided to help you.
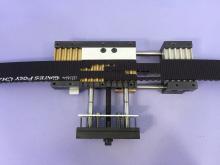
Step 2:
Place both ends of the Belt in the jaws.

Step 3:
Screw in the tensioning screw.
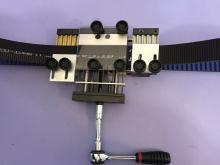
Step 4:
Insert the screws and lock the tool with the center plate. Then screw in the loading bars so that the rods insert into the Belt.
Step 5:
Check that the rods do not protrude beyond the ends of the Belt.