The assembly procedure is the same for all belts with textile folds.
ERO Joint® WT10 wide Timing belt assembly video:
Step 1:
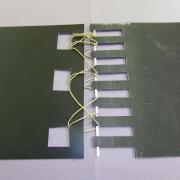
For the belt run, the previous belt can be cut, prepared and assembled at the ERO junction (one side mounted with a single rod or pieces of rod) so as to pull the new belt into the conveyor. (If necessary, secure the assembly by taping the teeth to the edge).
As soon as the belt has passed, remove the rod (or cut it off if necessary).
Be careful to follow the indicated direction of travel.
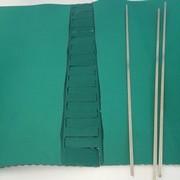
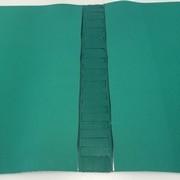
Step 2:
To begin assembly, place a small amount of solution in the hole in each finger of the band.
(This solution acts as a lubricant, making assembly easier)
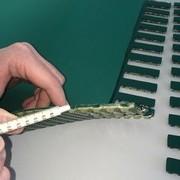
Step 3:
Then press the connecting fingers of the two ends together without waiting (the lubricant must not dry).
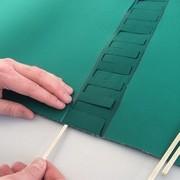
Step 4:
Finally, push in the rods, making sure they fit through the holes and not under the band on the outside of the fingers.
(We recommend using a board on the band to hold it in place, and vise-grips to push in the rod)
(If threading one of the rods proves too difficult, it can be cut to resume threading from the other side of the band or the middle of the band. This can also avoid the need to dismantle the edges if any are present)
Step 5:
Make sure that the rods do not protrude to avoid snagging. Make sure that the pins are well inserted into each tooth.
Wipe away any lubricant spillage.
This lubricant is non-hazardous, non-toxic and FDA-compliant.
The belt can now be tensioned (like a fused belt), adjusted and the conveyor started up.
The solution is a lubricant that will solidify and Glued over time. Not only does this make assembly much easier, it also prevents any slow migration of rods away from the running belt.